Code:a = [1, 2, 3]b = a[:]a.append(4)print(b)Solution and Explanation: Step 1: a = [1, 2, 3]This creates a list a containing the elements [1, 2, 3].Step 2: b = a[:]The [:] syntax creates a shallow copy of the list a.This means that...
1. Comparing Small Integersa = 100b = 100print(a is b)TrueExplanation:In Python, small integers (typically between -5 and 256) are cached and reused for efficiency.When you assign 100 to both a and b, they reference the same memory location...
Manhattan Distance in Pythondef manhattan_distance(point1, point2): return sum(abs(a - b) for a, b in zip(point1, point2))point1 = (1, 2)point2 = (4, 6)distance = manhattan_distance(point1, point2)print(f"Manhattan distance:...
Join Free: Django for Everybody SpecializationMastering Web Development with Django: A Journey Through the Django Specialization on CourseraIntroductionDjango is one of the most popular web frameworks for Python, known for its "batteries-included"...
A Quick Dive into Flask Framework for Beginners!🚀 Just finished the "Introduction to Flask Framework" project on Coursera, and here’s a quick rundown of what I learned! 🧵👇1️⃣ What is Flask?Flask is a micro web framework for Python....
Getting Started with Flask: Creating Your First Web ApplicationIntroductionFlask is a lightweight and versatile Python web framework that's perfect for beginners looking to develop their first web application. It's easy to set up, requires...
What you'll learnCreate Web Applications with FlaskUse WTForms and SQLAlchemy in Flask ApplicationsUse Templates in Flask ApplicationsJoin Free: Create Your First Web App with Python and FlaskAbout this Guided ProjectIn this 2-hour...
What you'll learnDescribe the steps and processes involved in creating a Python application including the application development lifecycle Create Python modules, run unit tests, and package applications while ensuring the PEP8 coding...
1. Saving and Loading a ListThis program saves a list to a file and then loads it back.import picklemy_list = ['apple', 'banana', 'cherry']with open('list.pkl', 'wb') as file: pickle.dump(my_list, file)with open('list.pkl',...
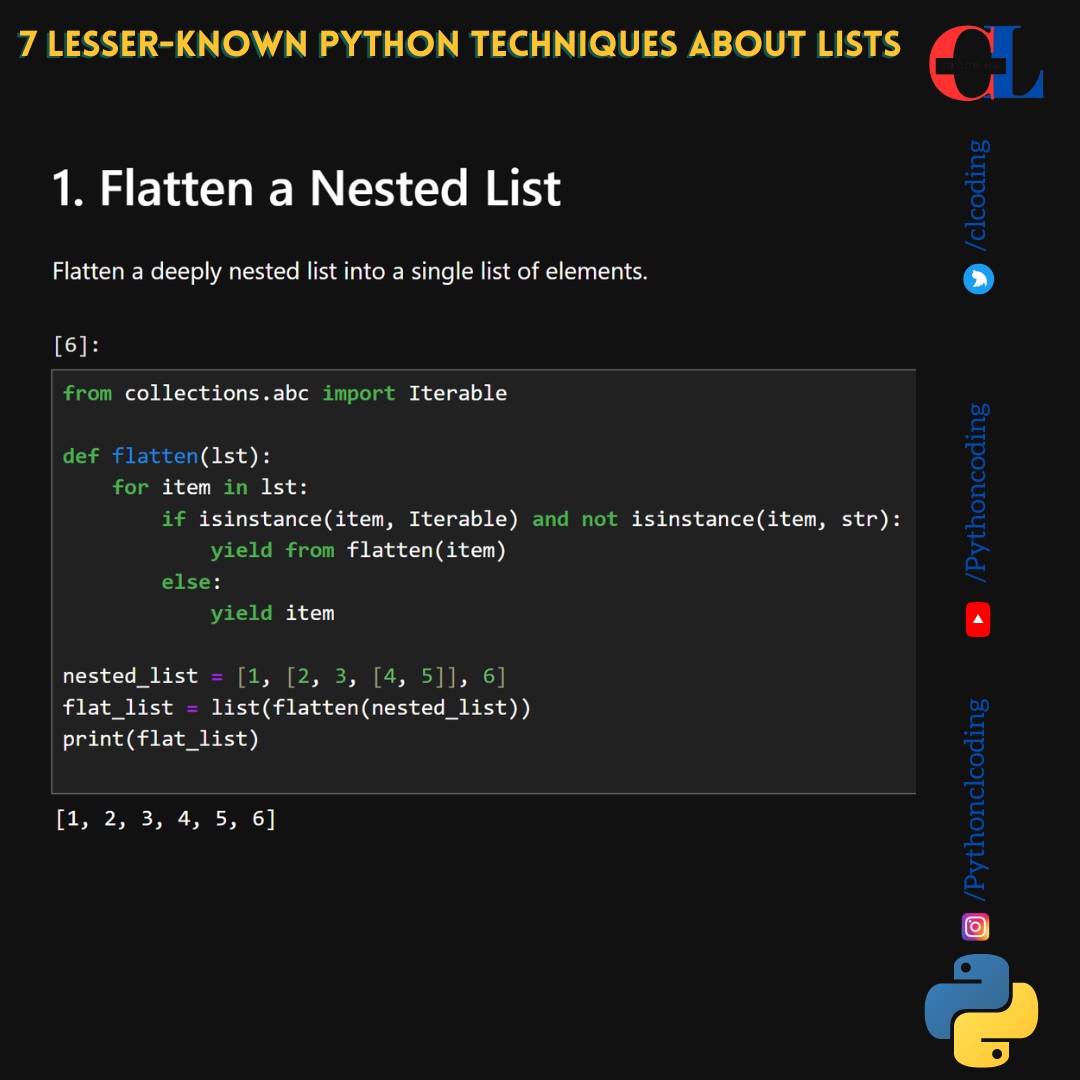
1. Flatten a Nested ListFlatten a deeply nested list into a single list of elements.from collections.abc import Iterabledef flatten(lst): for item in lst: if isinstance(item, Iterable) and not isinstance(item,...
1. Parse and Format a Phone NumberThis program parses a phone number and formats it in the international format.import phonenumbersfrom phonenumbers import PhoneNumberFormat, format_numberphone_number = phonenumbers.parse("+14155552671",...
Code:a = [1, 2, 3]b = aa.append(4)print(b)Solution and Explanantion: a = [1, 2, 3]:This line creates a list a with elements [1, 2, 3].b = a:Here, b is not a new list but a reference to the same list object that a refers to. In Python,...
Periodic Table Data in Pythonpip install chempyfrom chempy.util import periodicn = int(input("Enter number to see the table: "))print("Atomic No.\tName\t\tSymbol\t\tMass")for i in range(1, n + 1): print(i, end="\t\t") ...
1. Check if an IP Address is PrivateThis program checks whether an IP address belongs to a private range.import ipaddressdef check_private_ip(ip): try: ip_obj = ipaddress.ip_address(ip) ...
Basic UsageHere's a basic example of using f-strings:name = "Alice"age = 30greeting = f"Hello, my name is {name} and I am {age} years old."print(greeting)Hello, my name is Alice and I am 30 years old.Embedding ExpressionsYou can also...
Level 1: Basic Function DefinitionGoal: Learn how to define simple functions with def.def greet(): return "Hello, World!"Concepts: Function definition, return statement, and basic usage.Level 2: Function ArgumentsGoal: Understand...


.png)


.jpg)


.png)


